依赖注入(Dependency Injection)简单来说就是将一个对象作为参数输入给另一个类,让它们协同工作。
有两种方法注入:通过类的构造函数或者setter方法注入。
两种方法各有各的好处,也可以混用。可以通过构造函数注入确保参数一定会被注入,否则就会失败,setter方法可用于可选的依赖。Spring团队拥护构造函数注入,因为可以实现对象不可变和确保依赖不会是null。而且构造函数返回后对象永远处于完全初始化的状态。
通过构造函数
Beans.xml文件里bean的constructor-arg子标签。 它本身有name、index、type和ref、value属性,分别意味着按名称、目录顺序和类型区分构造函数的参数,ref是引用别的bean。
构造函数参数解析:Bean的构造函数参数顺序就是xml文件里面constructor-arg子元素的顺序。
也可以通过参数类型区分,constructor-arg子元素的type属性指定类型,value指定参数值。
还可以通过index属性指定参数位置,从0开始。
HelloWorld.java文件:
package com.explause.DenpendencyInjectionExamples;

public class HelloWorld {
	private String message;
	private HelloWorld2 helloWorld2;

	public void setMessage(String message){
		this.message  = message;
	}
	public void setHelloWorld2(HelloWorld2 helloWorld2) {
		this.helloWorld2 = helloWorld2;
	}
	public void getMessage() {
		System.out.println("Your Message : " + message);
		helloWorld2.getMessage();
	}

	public HelloWorld(HelloWorld2 helloWorld2) {
		System.out.println("Inside HelloWorld constructor");
		this.helloWorld2 = helloWorld2;
	}
}
HelloWorld2.java文件:
package com.explause.DenpendencyInjectionExamples;

public class HelloWorld2 {
	private String message;
	private String message2;

	public void setMessage(String message){
		this.message  = message;
	}
	public void getMessage(){
		System.out.println("Your Message : " + message);
		System.out.println("Your Message 2 : " + message2);
	}
	public void setMessage2(String message2){
		this.message2  = message2;
	}
}
DependencyInjectionDemo.java文件:
package com.explause.DenpendencyInjectionExamples;

import org.springframework.context.support.ClassPathXmlApplicationContext;

public class DependencyInjectionDemo {
	public static void main(String[] args) {
		ClassPathXmlApplicationContext context = new ClassPathXmlApplicationContext("Beans.xml");
		HelloWorld obj1 = (HelloWorld) context.getBean("helloWorld");
		obj1.getMessage();
		context.close();
	}
}
Beans.xml文件,通过constructor-arg标签的index属性注入:
<?xml version="1.0" encoding="UTF-8"?>
<beans xmlns = "http://www.springframework.org/schema/beans"
   xmlns:xsi = "http://www.w3.org/2001/XMLSchema-instance"
   xsi:schemaLocation = "http://www.springframework.org/schema/beans
   http://www.springframework.org/schema/beans/spring-beans-3.0.xsd">

	<bean id='helloWorld' class='com.explause.DenpendencyInjectionExamples.HelloWorld'>
		<property name="message" value='Hello World'/> <!-->单引号双引号没有影响<-->
		<constructor-arg index='0' ref="helloWorld2"/> <!-->这行是使用构造函数按目录顺序注入<-->
	</bean>

	<bean id='helloWorld2' class='com.explause.DenpendencyInjectionExamples.HelloWorld2'>
		<property name="message" value='Hello World'/>
		<property name="message2" value='Hello World 2'/>
	</bean>
</beans>
或者通过constructor-arg标签的type属性注入:
<?xml version="1.0" encoding="UTF-8"?>
<beans xmlns = "http://www.springframework.org/schema/beans"
xmlns:xsi = "http://www.w3.org/2001/XMLSchema-instance"
xsi:schemaLocation = "http://www.springframework.org/schema/beans
http://www.springframework.org/schema/beans/spring-beans-3.0.xsd">
<bean id='helloWorld' class='com.explause.DenpendencyInjectionExamples.HelloWorld'>
<property name="message" value='Hello World'/> <!-->单引号双引号没有影响<-->
<!-->下面这行是使用构造函数按类型注入<-->
<constructor-arg type='com.explause.DenpendencyInjectionExamples.HelloWorld2' ref="helloWorld2"/>
</bean>
<bean id='helloWorld2' class='com.explause.DenpendencyInjectionExamples.HelloWorld2'>
<property name="message" value='Hello World'/>
<property name="message2" value='Hello World 2'/>
</bean>
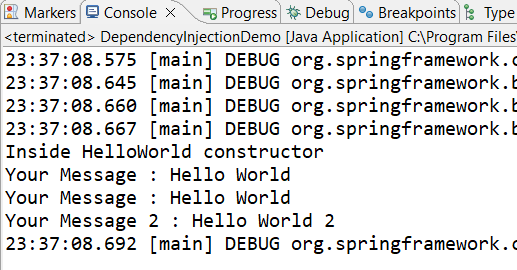
</beans>执行main方法的结果:
基于setter方法
其实就是xml文件里bean标签的property子标签。有name、ref和value属性。
ref是引用别的bean。
通过property标签的name属性:类文件内的变量(字段)名字。setter方法的命名必须遵守小驼峰命名法,即set小写,后面的名字首字母大写,就像setMessage()一样,否则框架会认不出来。
基于setter可以注入内层bean:只要稍微修改一下Beans.xml文件:
<?xml version="1.0" encoding="UTF-8"?>
<beans xmlns="http://www.springframework.org/schema/beans"
	xmlns:xsi="http://www.w3.org/2001/XMLSchema-instance"
	xsi:schemaLocation="http://www.springframework.org/schema/beans
   http://www.springframework.org/schema/beans/spring-beans-3.0.xsd">

	<bean id='helloWorld'
		class='com.explause.DenpendencyInjectionExamples.HelloWorld'>
		<property name="message" value='Hello World' /> <!-->单引号双引号没有影响< -->
		<property name="helloWorld2">
			<bean id='helloWorld2' class='com.explause.DenpendencyInjectionExamples.HelloWorld2'>
				<property name="message" value='Hello World' />
				<property name="message2" value='Hello World 2' />
			</bean>
		</property>
	</bean>
</beans>